【django】 pytestの基本の使い方

djangoのテストツールは標準ライブラリのunittestを拡張したものがありますが、現在主流のpytestがおすすめです。
今回はpytestの基本の使い方をご紹介いたします。
Django/DjangoRESTframeworkについて記事まとめ
pytestとは
https://docs.pytest.org/en/7.1.x/
pytestとは、作成した関数やメソッドが意図したとおりに動くかどうか確認するための単体テストを作成し、まとめてテストを実行・結果を報告してくれるテストツールです。
unittestの場合、クラス定義が必要であったり、一部シンプルではないため現在よく使われるのはpytestらしいです。
また、unittestで作成済みのテストコードでも、簡単にpytestを導入できるのも特徴です。
djangoのインストールとプロジェクト設定
pytestを扱う前に、djangoのインストールだけ済ましておきます。仮想環境を作成し、プロジェクトを作成しておきます。
$ pip install django
$ django-admin startproject core .
pytest-django
pytestにはdjango用のラッパーのpytest-djangoがあります。
https://pytest-django.readthedocs.io/en/latest/
これを使用すれば、djangoと便利に密接なテストが可能です。
pytest-djangoのインストールは
$ pip install pytest-djangopytest.iniの作成
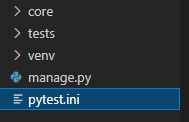
ディレクトリ直下にpytest.iniを作成します。
https://pytest-django.readthedocs.io/en/latest/tutorial.html
ここでは、djangoのsettings.pyとテストファイルの命名規則を記述しています。
今回の場合だと、頭にtestがつくファイル全てが対象です。
[pytest]
DJANGO_SETTINGS_MODULE = core.settings
python_files = test_*.py
基本のpytestの実行
tests/test_ex1.pyを作成します。
import pytest

def test_one_plus_one():
    number = 1 + 1
assert number == 2pytestをインポートし、1+1が2かどうかテストします。
assertでの処理が予期している処理であればOKです。ルートディレクトリでpytestを実行します。
$ pytest

============================== test session starts ==============================
platform win32 -- Python 3.10.1, pytest-7.1.1, pluggy-1.0.0
django: settings: core.settings (from ini)
rootdir: C:\Users\python\django-pytest, configfile: pytest.ini
plugins: django-4.5.2
collected 1 item

tests\test_ex1.py .                                                        [100%]

=============================== 1 passed in 0.04s ===============================
このように結果が表示されます。逆にテストに失敗している場合はどうでしょうか。わざと失敗するテストを作成します。
def test_failure_one_plus_one():
    number = 1 + 1
    assert number == 1
実行すると・・・
=================================== FAILURES ====================================
___________________________ test_failure_one_plus_one ___________________________

    def test_failure_one_plus_one():
        number = 1 + 1
>       assert number == 1
E       assert 2 == 1

tests\test_ex1.py:9: AssertionError
============================ short test summary info ============================
FAILED tests/test_ex1.py::test_failure_one_plus_one - assert 2 == 1
========================== 1 failed, 1 passed in 0.16s ==========================
この様に、どれが失敗で、どこに問題があるのかわかりやすく表示されます。
特定のテストのみを実行する
pytestの引数で実行するテスト範囲を指定できます。
| ファイル | pytest tests/test_xx.py |
| 関数 | pytest tests/test_xx.py::test_function |
| クラス | pytest tests/test_xx.py::TestClass |
| クラスのメソッド | pytest tests/test_xx.py::TestClass::test_method |
主な引数
-x失敗したテストがあった場合、テストを即終了します-rPテスト内に記述したprint()を出力します
マーカー設定(@pytest.mark)
テストに対してデコレーターでマーカーを設定することができます。
@pytest.mark.skip
def test_one_plus_one():
    print('test one')
    number = 1 + 1
    assert number == 2

@pytest.mark.xfail
def test_failure_one_plus_one():
    number = 1 + 1
assert number == 1@pytest.mark.skipskipでテストをスキップ@pytest.mark.xfailあらかじめテストが失敗していることが分かっている場合などに使用します。
他にも任意のマーカーを設定することが可能でpytest.iniで設定できます。
[pytest]
DJANGO_SETTINGS_MODULE = core.settings
python_files = test_*.py

markers =
    slow: slow running test
ここで設定したマーカーだけをテストすることも可能です。
pytest -m "slow"とするだけです。


参考
- Pytest | Django | Gentle Introduction, Setup and Start Testing
- pytest: helps you write better programs
- pytest-django Documentation
Django/DjangoRESTframeworkについて記事まとめ
コメント