【FastAPI】任意のhttpステータスコードを付与する【入門】
当ページのリンクには広告が含まれています。

代表的なステータスコードには
- 成功(Success)の
200 - 未検出(Not Found)の
404 - サーバーエラー(Internal Server Error)の
500
等がありますが、レスポンスがどのような状態なのか判断するのに重要な要素となります。
デジタルマーケティング研究所


HTTPステータスコードとは?種類とそれぞれの役割について|Webマーケティング・SEO相談はデジ研
ステータスコードには「古いページから新しいページには301リダイレクト」、「存在しないページにアクセスされた際は404エラーページ」などの指示があります。そこで今回は…
例えば、データベースに登録された情報を参照する場合、データが登録されていれば200番、見つからなければ404番にするなどの処理が考えられます。
今回はFastAPIで任意のステータスコードを付与する方法を記載いたします。
あわせて読みたい

Response Status Code – FastAPI
FastAPI framework, high performance, easy to learn, fast to code, ready for production
FastAPIの基礎についての記事まとめ
目次
基本形
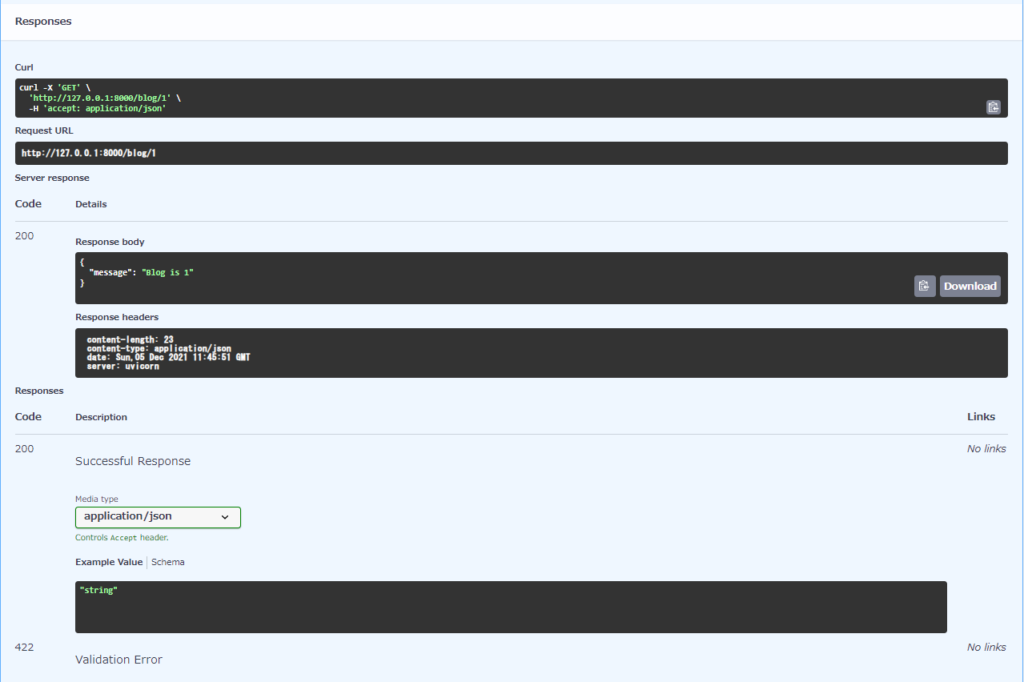
今回は下記を基本形としてステータスコードを分岐させていきます。ブログの記事情報を取得するAPIを想定しています。
from fastapi import FastAPI

app = FastAPI()

@app.get('/blog/{id}')
def get_blog(id: int):
return {'message': f'Blog is {id}'}完成形として、記事があれば200、無ければ404とします。現状は下記のような状態です。
ステータス初期値の記載
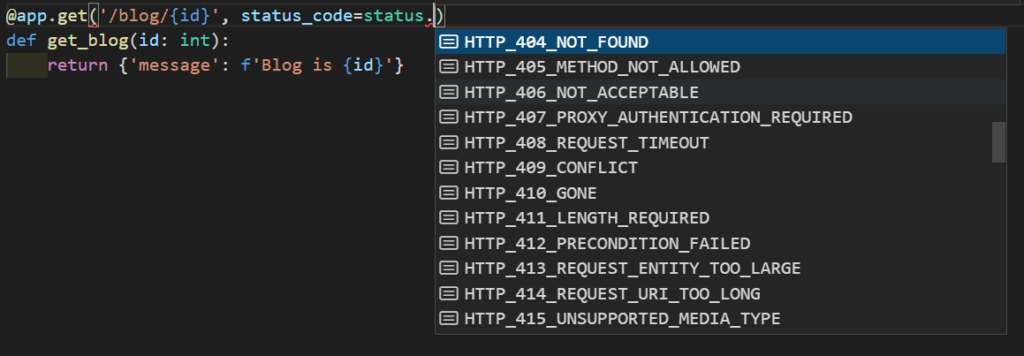
ステータスコードに初期値を指定する場合には、デコレーターにstatus_code=status.○○○の形式で記載します。
その時、fastapiからstatusをインポートします。
from fastapi import FastAPI, status <-- Add

app = FastAPI()

@app.get('/blog/{id}', status_code=status.HTTP_200_OK) <-- Add
def get_blog(id: int):
    return {'message': f'Blog is {id}'}
ステータスコードは一通り揃っているので迷う事は無さそうです。
ステータスコードの出し分け
例えばblogのidが1~3しか登録が無く、4以上はデータが無い場合には
- 1~3 は
200 - 4以上は
404
となります。これを見立ててやってみます。
まずfastapiからResponseをインポートし、引数にresponse: Response、それぞれステータスコードを記載します。
from fastapi import FastAPI, status, Response <-- Add

~~~

@app.get('/blog/{id}', status_code=status.HTTP_200_OK)
def get_blog(id: int, response: Response): <-- Add
    if id > 3:
        response.status_code = status.HTTP_404_NOT_FOUND
        return {'error': f'Blog {id} not found'}
    else:
        response.status_code = status.HTTP_200_OK
return {'message': f'Blog {id} found'}それぞれに、response.status_code = status.○○○形式でステータスを付与しています。
ステータスコードの確認
http://127.0.0.1:8000/docsでステータスコードの確認を行います。
idを2にした場合には
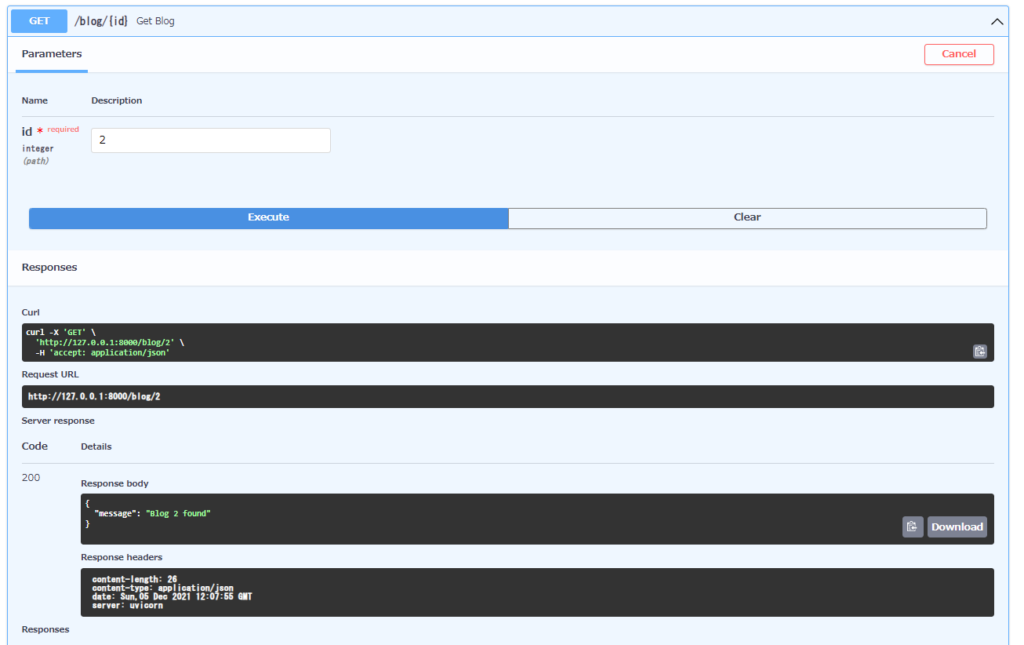
200に、idを3以上の5にした場合には
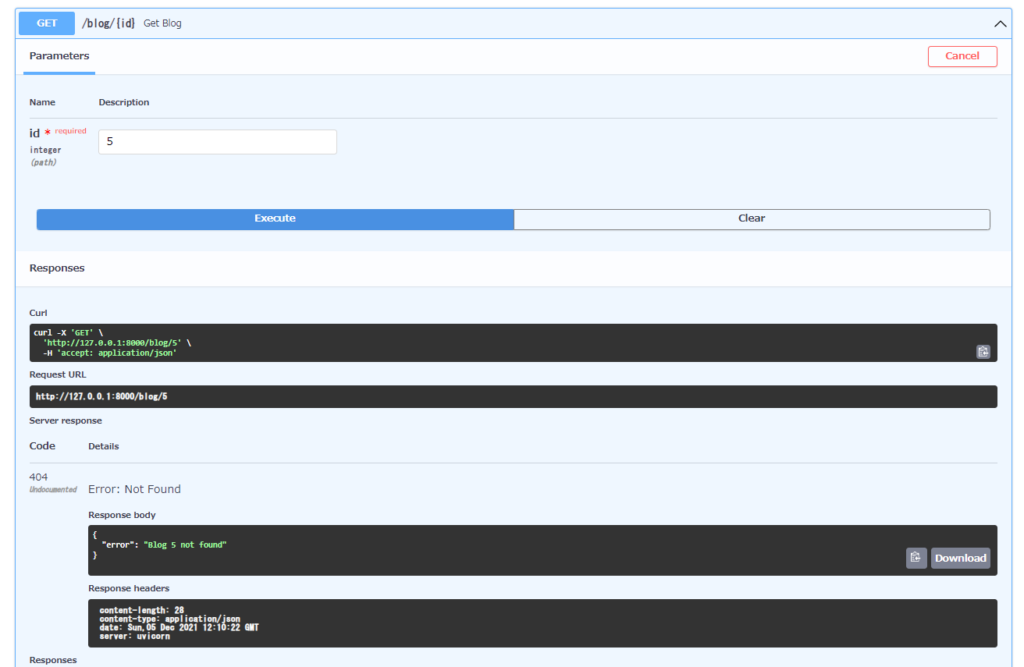
404が返ってきています!無事成功です!
FastAPIの基礎についての記事まとめ
コメント